 The Flying Kite Studios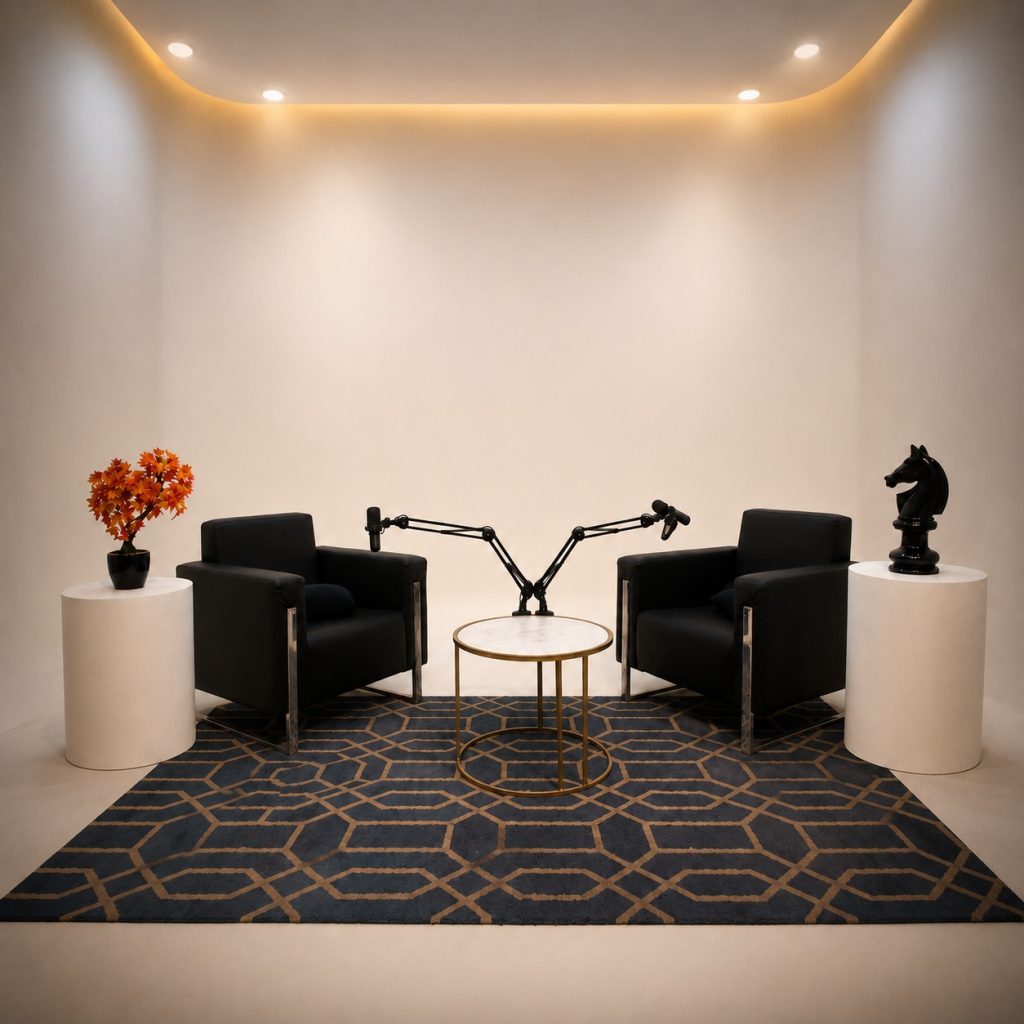
To make a podcast studio, you need four things: a suitable room, controlled acoustics, reliable recording equipment, and a setup designed around the way you plan to record.
A professional podcast studio does not simply mean putting microphones and cameras around a table. The room itself, acoustic treatment, microphone placement, lighting, camera angles, monitoring, cable management, and recording workflow all affect the final production.
Whether you are building a podcast studio at home, creating a dedicated commercial recording space, or designing a professional content studio, the objective is the same: create a controlled environment where voices sound clear, natural, consistent, and professional.
At The Flying Kite Studios, we believe a good podcast setup begins with the room rather than the equipment. Expensive cameras and microphones cannot completely compensate for poor room acoustics or an unsuitable recording environment.
This guide explains how to make a podcast studio from the ground up, including room selection, acoustic treatment, microphones, cameras, lighting, recording equipment, furniture, connectivity, and the practical mistakes to avoid.
What Is a Podcast Studio?
A podcast studio is a dedicated or adapted space designed for recording spoken-word audio and, increasingly, video podcasts.
A basic podcast studio can be a quiet room with good acoustic control, microphones, headphones, and recording software. A professional podcast studio can include:
- Multiple broadcast-quality microphones
- Audio interfaces or digital mixers
- Monitoring headphones
- Acoustic panels and bass treatment
- Video cameras
- Professional lighting
- Podcast furniture
- Multiple camera angles
- Teleprompter or monitor systems
- High-speed storage
- Backup recording systems
- Streaming equipment
- Post-production workstations
The right setup depends on the format of your podcast.
A solo podcast needs a different configuration from a two-person interview show. A four-person roundtable requires more microphones, more physical space, additional acoustic planning, and a recording system capable of handling several inputs simultaneously.
How to Make a Podcast Studio Step by Step
1. Decide What Type of Podcast You Want to Record
Before buying equipment, define your production format.
Ask yourself:
- Will the podcast be audio-only or video?
- How many people will normally be on camera?
- Will guests join remotely?
- Will you record interviews?
- Will you livestream?
- Will you need multiple camera angles?
- Will the studio also be used for reels and short-form content?
- Will clients or external creators use the space?
These decisions affect almost every part of your studio.
For example, a solo podcast may require only one microphone and one camera. A four-person interview podcast may require four microphones, four headphone feeds, multiple cameras, additional lighting, and a larger recording space.
Plan the workflow before purchasing the gear.
2. Choose the Right Room
The room is one of the most important parts of a podcast studio.
Look for a room that is:
- Away from heavy traffic
- Relatively quiet
- Free from constant mechanical noise
- Large enough for your intended number of speakers
- Easy to control acoustically
- Suitable for lighting and camera placement
- Equipped with sufficient electrical outlets
Avoid rooms directly beside elevators, busy roads, generators, loud air-conditioning systems, or other persistent sources of noise.
Room size also matters.
A tiny room can create strong reflections and an uncomfortable recording environment, while an excessively large untreated room can produce noticeable reverberation.
The ideal room is not necessarily the largest room. It is the room you can control.
3. Understand the Difference Between Soundproofing and Acoustic Treatment
This is one of the most important concepts when learning how to make a podcast studio.
Soundproofing and acoustic treatment are not the same thing.
Soundproofing
Soundproofing is concerned with reducing sound travelling into or out of a room.
It may involve:
- Wall construction
- Mass
- Sealing gaps
- Doors
- Windows
- Floors
- Ceilings
- Structural isolation
Acoustic treatment
Acoustic treatment improves the sound inside the room.
It helps manage:
- Reflections
- Reverberation
- Flutter echo
- Excessive brightness
- Low-frequency buildup
- Uneven room response
For podcasting, acoustic treatment is particularly important because speech needs to remain intelligible.
A microphone can capture every reflection from a hard wall, glass surface, desk, or ceiling. The result can sound hollow, echoey, or distant.
That is why a good podcast studio should be designed around the room’s acoustic behaviour rather than simply decorated with foam.
4. Treat the Room for Clear Speech
A podcast studio should control reflections without making the room unnaturally dead.
Useful acoustic elements include:
Acoustic panels
Place broadband absorption panels at important reflection points around the recording area.
Bass traps
Low frequencies can accumulate in room corners. Bass treatment can help produce a more controlled acoustic environment.
Ceiling treatment
If the ceiling is reflective, overhead absorption can reduce reflections reaching the microphones.
Soft furnishings
Carpets, curtains, upholstered furniture, and other appropriate soft surfaces can contribute to reducing reflections.
Avoid relying only on decorative foam
Small foam tiles may absorb some high-frequency energy, but they are not a complete acoustic solution.
A well-designed studio considers the whole room, not just the wall directly behind the microphone.
Aslo:- You can check out our Podcast studio in Gurgaon, please visit our space so that you can decide how you can setup an podcast studio
5. Select the Right Podcast Microphones
Your microphone is one of the most important pieces of podcast equipment.
For spoken-word recording, dynamic microphones are often a practical choice because they can work well when positioned close to the speaker and can help reduce the amount of surrounding room sound being captured.
Condenser microphones can also be useful depending on the room and production requirements.
When choosing a microphone, consider:
- Room acoustics
- Speaker distance
- Voice characteristics
- Number of speakers
- Connection type
- Budget
- Recording workflow
For a professional multi-person podcast, every speaker should generally have a dedicated microphone rather than sharing one microphone across the table.
Current podcasting guidance from Shure similarly emphasizes the importance of microphones, monitoring, interfaces/mixers, stands and cables, recording software, and—when video is involved—a suitable camera or webcam.
6. Position the Microphones Correctly
Buying a good microphone is only part of the solution.
Microphone technique matters.
The microphone should normally be positioned close enough to capture a strong voice signal while remaining comfortable for the speaker.
A pop filter or appropriate windscreen can help control unwanted plosive sounds such as harsh bursts from certain consonants.
Keep the microphone stable and position it consistently.
For multiple speakers, make sure each microphone has enough physical separation to avoid awkward positioning and excessive microphone bleed.
A professional-looking podcast studio should also keep microphone arms, cables, and stands organized so the setup does not interfere with cameras or guests.
7. Add Headphones for Monitoring
Closed-back headphones are useful for podcast recording because they allow speakers and producers to monitor the recording without sending the playback back into the microphones.
Headphones help you identify problems while recording, including:
- Background noise
- Distortion
- Electrical interference
- Clothing noise
- Plosives
- Incorrect microphone distance
- Excessive room sound
It is much easier to fix a problem before recording than after an entire episode has been produced.
8. Choose an Audio Interface or Podcast Mixer
If your microphones use XLR connections, you will need a suitable audio interface, mixer, or podcast production system.
The right device depends on the number of microphones and the complexity of your workflow.
For example:
One-person podcast:
A simple interface may be enough.
Two-person interview:
Choose a system with at least two suitable microphone inputs.
Four-person podcast:
You will need enough independent inputs for every microphone, plus appropriate headphone monitoring.
A more advanced studio may also need:
- Multiple headphone outputs
- Separate monitor mixes
- Remote guest integration
- Mix-minus functionality
- Hardware processing
- Backup recording
- Digital routing
The goal is not to buy the most complicated mixer. The goal is to build a workflow that is reliable and easy to operate.
9. Choose Your Podcast Recording Software
Your computer and recording software form the production centre of the studio.
Depending on your workflow, you may use a digital audio workstation or dedicated podcast recording platform.
Your software should allow you to:
- Record multiple tracks
- Monitor audio
- Edit dialogue
- Remove unwanted sections
- Balance levels
- Add music
- Apply processing
- Export finished episodes
Multitrack recording is particularly useful because each speaker can be edited independently.
This becomes extremely valuable when one person speaks louder than another or when you need to remove a specific noise from one microphone.
10. Add Cameras If You Are Making a Video Podcast
Video podcasting requires another layer of planning.
You need to consider:
- Camera resolution
- Lens choice
- Framing
- Camera position
- Background
- Lighting
- Recording duration
- Storage
- Multiple camera angles
A two-person interview might use:
- A wide shot showing both hosts.
- A close-up of the host.
- A close-up of the guest.
A larger podcast may require additional cameras.
The important point is to plan camera positions before placing furniture and lighting.
A camera needs enough physical distance from the subject to create the framing you want.
11. Design Professional Podcast Lighting
Lighting can dramatically change the appearance of a video podcast.
A simple three-point lighting concept can include:
Key light
The primary light illuminating the subject.
Fill light
Used to control excessive shadows and balance the key light.
Backlight or hair light
Used to create separation between the subject and background.
However, you do not necessarily need an elaborate lighting rig.
A well-designed podcast studio can combine:
- Soft key lighting
- Practical lights
- Background lighting
- Accent lighting
- Controlled ambient light
Avoid relying heavily on overhead room lights because they can create unattractive shadows and inconsistent skin tones.
12. Create a Strong Podcast Studio Background
The background is part of your visual identity.
For a branded studio, consider incorporating:
- Studio signage
- Brand colours
- Shelving
- Books
- Plants
- Artwork
- Practical lamps
- Acoustic panels
- Architectural elements
The background should support the podcast rather than compete with the speakers.
For The Flying Kite Studios, the studio environment itself can become part of the visual identity. A recognizable set helps viewers associate the visual style of your podcast content with the brand.
13. Choose the Right Podcast Studio Furniture
A podcast table should be stable, comfortable, and visually appropriate.
Consider:
- Table size
- Number of speakers
- Microphone mounting
- Cable routing
- Camera framing
- Legroom
- Guest comfort
Avoid extremely reflective tables if they create strong unwanted reflections or acoustic issues.
Chairs should also be quiet.
A chair that squeaks every time a guest moves can become an editing problem.
14. Plan Cable Management
Cable management is often overlooked during podcast studio design.
Use appropriate:
- Cable trays
- Floor channels
- Velcro straps
- Under-desk management
- Labelled cables
- Wall routing where appropriate
Keep power and signal cables organized and avoid creating unnecessary trip hazards.
Label important connections.
A professional studio should allow someone to understand the setup quickly, even if they did not install it.
15. Build Redundancy Into the Recording System
A podcast episode can take hours to record.
Losing the recording because of a computer crash, corrupted file, disconnected cable, or storage problem can be extremely costly.
Where practical, consider:
- Local backup recording
- Separate audio recording
- Reliable storage
- External backups
- Spare cables
- Spare batteries
- Backup microphones
- Uninterruptible power protection where appropriate
The exact redundancy strategy depends on the studio’s scale, but the principle is simple:
Do not allow one failure point to destroy an entire production.
16. How Much Does It Cost to Make a Podcast Studio?
There is no single podcast studio cost because the budget depends on the room, equipment, number of speakers, video requirements, acoustic work, and production level.
A basic setup may include:
- One or two microphones
- Headphones
- Audio interface
- Computer
- Basic acoustic treatment
- Simple lighting
- One camera
A professional studio can add:
- Multiple broadcast microphones
- Advanced audio routing
- Several cameras
- Professional lighting
- Custom acoustic treatment
- Studio furniture
- Dedicated recording equipment
- Backup systems
- Professional post-production facilities
Instead of spending your entire budget on cameras or microphones, allocate money across the room, acoustics, audio, video, lighting, furniture, and reliability.
A balanced studio usually produces better results than an expensive equipment collection placed in an untreated room.
17. Can You Make a Podcast Studio at Home?
Yes.
A home podcast studio can produce excellent results if the room is selected and treated carefully.
Start with:
- The quietest practical room.
- Acoustic treatment.
- A suitable microphone.
- Closed-back headphones.
- An audio interface if required.
- Recording software.
- Appropriate lighting if shooting video.
- A stable camera setup.
- Good cable management.
You do not need to build a commercial studio to start a podcast.
However, if you are producing podcasts for clients, recording branded corporate content, or creating high-volume video podcasts, a dedicated professional studio can make the production process much easier and more consistent.
18. Common Podcast Studio Mistakes to Avoid
Buying equipment before treating the room
A premium microphone cannot completely solve poor room acoustics.
Using too much acoustic foam
More absorption is not automatically better. The goal is controlled sound, not necessarily a completely dead room.
Ignoring background noise
Air conditioners, fans, traffic, elevators and electrical equipment can become very noticeable during quiet sections.
Using one microphone for multiple people
Individual microphones generally provide greater control during editing and mixing.
Poor microphone positioning
Even a high-quality microphone can produce disappointing results when positioned incorrectly.
Forgetting video composition
A technically good camera can still produce weak content if the background, framing and lighting are poorly planned.
No backup
A professional workflow should consider what happens if the primary recording fails.
Designing the studio around equipment instead of workflow
The best setup is the one that makes recording simple, repeatable and reliable.
19. What Equipment Do You Need for a Podcast Studio?
A practical podcast studio equipment checklist includes:
Audio
- Podcast microphones
- Microphone arms or stands
- XLR cables where required
- Audio interface or mixer
- Closed-back headphones
- Headphone distribution
- Pop filters or windscreens
Acoustic treatment
- Broadband acoustic panels
- Bass treatment where appropriate
- Ceiling treatment where necessary
- Soft furnishings
Video
- Cameras
- Appropriate lenses
- Tripods or mounting systems
- Memory/storage
- Video recording accessories
Lighting
- Key light
- Fill light
- Backlight
- Practical/background lights
- Light stands or mounting systems
Production
- Computer
- Recording software
- Editing software
- Storage
- Backup drives
- Cable management
- Power protection
The exact equipment list should be based on your recording format rather than a generic shopping list.
20. How to Design a Professional Podcast Studio
Professional podcast studio design should combine acoustics, ergonomics, visual identity, technology and workflow.
A good studio should allow the host to sit comfortably, speak naturally, see the guest, monitor the recording, and remain within the camera frame.
The producer should be able to access the recording system without disturbing the conversation.
The cameras should have clear sightlines.
Lighting should remain consistent.
Cables should stay out of the way.
And the room should sound good before any heavy editing begins.
This is where professional studio planning makes a difference.
At The Flying Kite Studios, the objective should not simply be to create a room that looks like a podcast studio. The goal is to create an environment where good audio, professional video and a smooth production workflow work together.
Frequently Asked Questions About Making a Podcast Studio
What do you need to make a podcast studio?
At minimum, you need a suitable room, acoustic control, a microphone, headphones, a recording system and recording software. A video podcast additionally requires cameras, lighting and suitable video storage.
How much does it cost to build a podcast studio?
The cost varies significantly depending on room construction, acoustic treatment, number of microphones, cameras, lighting, furniture and production requirements. A simple home setup can cost far less than a dedicated professional studio.
What is the most important equipment in a podcast studio?
The microphone and recording environment are particularly important, but professional results come from the complete system. Room acoustics, microphone technique, recording levels, monitoring and post-production all contribute to the final sound.
Do I need acoustic treatment for a podcast studio?
In most rooms, some form of acoustic treatment is highly beneficial. It can reduce unwanted reflections and reverberation and make spoken-word recordings easier to understand.
Can I build a podcast studio in a small room?
Yes. A small room can work well if it is quiet and acoustically controlled. The layout needs to leave enough space for the host, guest, microphones, cameras and lighting.
Should I use dynamic or condenser microphones for podcasting?
Both can work. The appropriate choice depends on the room, microphone technique, voice, desired sound and production workflow. Dynamic microphones are often practical for spoken-word recording, particularly when room noise needs to be controlled.
How many microphones do I need for a podcast?
Generally, plan for one microphone per person speaking. A two-person podcast would therefore normally use two microphones, while a four-person podcast would need four.
Is a camera necessary for a podcast studio?
Not for an audio-only podcast. However, if you plan to publish video podcasts, YouTube episodes, clips or social media content, cameras become an important part of the studio setup.
What makes a podcast studio sound professional?
A controlled acoustic environment, appropriate microphones, correct microphone placement, clean recording levels, reliable monitoring and thoughtful post-production all contribute to professional podcast audio.
Can I make a professional podcast studio at home?
Yes. A carefully selected room, good acoustic treatment and appropriate equipment can create a strong home podcast setup. The key is to control the recording environment rather than simply buying expensive equipment.
Final Checklist: How to Make a Podcast Studio
Before recording your first episode, check the following:
Room
- Is the room quiet?
- Is outside noise controlled?
- Are reflective surfaces treated?
Acoustics
- Are major reflections controlled?
- Is the room balanced rather than excessively dead?
Audio
- Does every speaker have a dedicated microphone?
- Are microphones positioned consistently?
- Are headphones available for monitoring?
- Are recording levels safe?
Video
- Are cameras correctly framed?
- Is the background intentional?
- Are all subjects properly lit?
Workflow
- Are cables organized?
- Is storage available?
- Is there a backup recording plan?
- Can another person operate the setup easily?
Brand
- Does the studio look recognizable?
- Does the set reflect the brand?
- Can the same visual environment work for long-form episodes and short-form clips?
If the answer to these questions is yes, you are much closer to a dependable podcast production environment.
Build Your Podcast Studio With the Right Strategy
Learning how to make a podcast studio is ultimately less about buying the biggest microphone, most expensive camera or latest piece of equipment.
It is about creating a controlled system.
Start with the room.
Control the acoustics.
Choose equipment according to your format.
Design the lighting and camera positions around the conversation.
Create a reliable recording workflow.
Build redundancy into important parts of the system.
And make the studio visually consistent with your brand.
For creators, businesses, interview shows and professional productions,The Flying Kite Studios can serve as more than a recording space—it can be an environment designed around the complete podcast production experience.
A successful podcast studio should make one thing easier: telling great stories without technical distractions.
Quick Answer
How do you make a podcast studio?
To make a podcast studio, choose a quiet room, control its acoustics, select microphones based on the number of speakers, add headphones and an appropriate recording system, then build the camera, lighting, furniture and workflow around your podcast format. For professional results, prioritize room acoustics and reliable workflow alongside equipment.
About The Flying Kite Studios
The Flying Kite Studios is a podcast and content production brand focused on creating professional environments for recording conversations, interviews and video content. The studio setup should be designed around the needs of modern creators and brands—from clean audio and professional visuals to an efficient recording workflow.