 The Flying Kite Studios
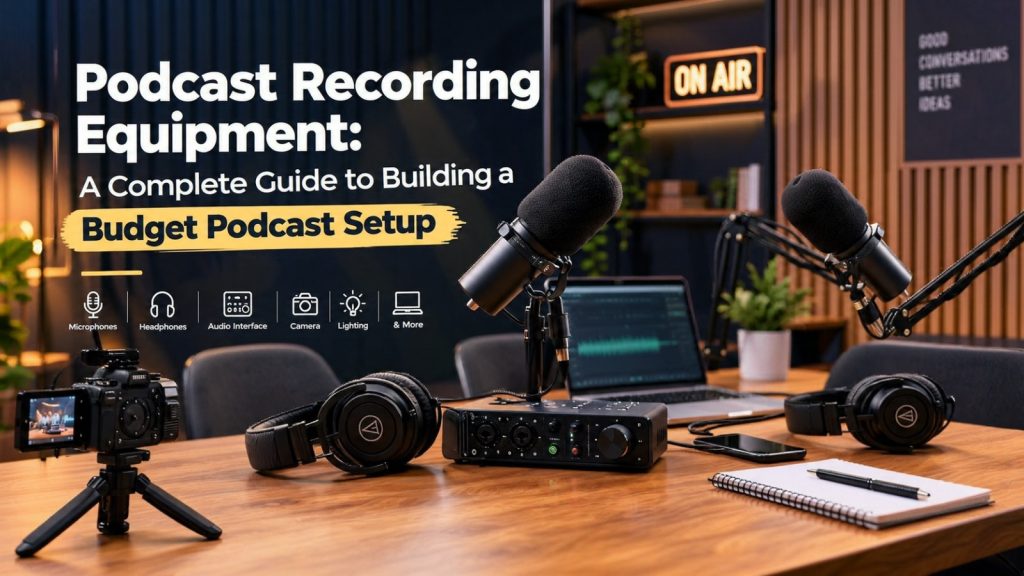
Choosing the right podcast recording equipment is essential for creating high-quality audio and video content without spending a fortune. Fortunately, you don’t need an expensive studio or a complicated setup to get started. With the right equipment, a quiet recording space, and a little planning, you can produce professional-looking podcasts on a reasonable budget.
Whether you’re a beginner, content creator, entrepreneur, or business owner, understanding the essential podcast recording equipment can help you make smarter purchasing decisions. From microphones and cameras to lighting and editing software, every component plays an important role in the final result.
At The Flying Kite Studios in Gurugram, we understand that great podcast content starts with the right combination of sound, visuals, and storytelling. Therefore, this guide covers the essential equipment you need, how to choose it, and where you can save money without compromising on quality.
1. Microphone: The Foundation of Podcast Recording Equipment
First and foremost, audio quality is one of the most important elements of a successful podcast. Although viewers may tolerate simple visuals, poor sound can quickly make them stop watching.
For this reason, choosing the right microphone should be one of your first priorities when building your podcast recording equipment setup. A suitable microphone helps capture clear dialogue while reducing unwanted background noise.
Hollyland LARK 2 Wireless Microphone
The Hollyland LARK 2 wireless microphone system is a practical option for creators who want a compact and convenient audio setup. In particular, its wireless design can make recording interviews and video podcasts easier.
Why consider it?
- Wireless recording provides greater freedom of movement.
- Its compact design is suitable for interviews, video podcasts, and content creation.
- It helps reduce cable clutter around the recording area.
- Depending on the selected configuration, it can simplify recording for presenters and guests.
Best for: Beginners, solo creators, interviews, and portable podcast setups.
Budget tip: Before purchasing, check the exact transmitter and receiver configuration. For example, if you plan to record a podcast with multiple speakers, make sure the system supports the number of people you need to record. Additionally, test microphone placement and audio levels before starting the session.
Ultimately, clear and consistent dialogue is more important than simply owning expensive equipment.
2. Camera: Capture Professional-Looking Podcast Videos
Once your audio setup is sorted, the next step is choosing a suitable camera. If you’re creating a video podcast for YouTube, Instagram, or other social platforms, a dedicated camera can improve image quality and give you greater control over the final look.
Sony ZV-E10 Camera
The Sony ZV-E10 is a mirrorless camera designed with content creators in mind. As a result, it can be a useful choice for video podcasts, interviews, talking-head videos, and branded content.
Why consider it?
- Interchangeable lenses provide flexibility for different framing styles.
- It offers a versatile setup for recording interviews and presenter-led videos.
- Its compact camera body is suitable for studio and creator workflows.
- It provides greater creative control than a basic webcam setup.
Best for: YouTube podcasters, entrepreneurs, interview shows, and video content creators.
Budget tip: Rather than purchasing multiple cameras immediately, start with one camera and learn to frame your shots properly. Later, as your podcast grows, you can introduce additional cameras to capture close-ups and alternate angles.
However, remember that the camera body is only one part of your podcast recording equipment. You should also budget for a suitable lens, tripod, memory card, and appropriate power solution where needed. For longer recordings, check the camera’s recording settings and operating conditions before your session.
3. Lighting: Improve Your Podcast Video Quality
In addition to good audio and video, lighting plays a major role in the overall appearance of your podcast. Even a capable camera can produce disappointing results if the subject is poorly lit.
Fortunately, you don’t always need several expensive lights to create an attractive recording setup. Instead, start with one suitable key light and build your lighting arrangement gradually.
Nanlite 300W Bi-Color LED Light
A Nanlite 300W bi-color LED light is a useful lighting option for podcast studios, interviews, and video production. Its bi-color capability allows you to adjust the color temperature to suit your recording environment and desired visual style.
Why consider it?
- Bi-color adjustment lets you create warmer or cooler lighting.
- A 300W-class light can serve as a useful key-light source for many studio setups.
- When paired with a compatible softbox or light modifier, it can help create softer, more flattering illumination.
- It provides flexibility when matching the light to the room and background.
Best for: Video podcasts, interview setups, YouTube shoots, and professional-looking creator content.
Budget tip: To begin with, position the light at an angle to the speaker rather than pointing it directly at their face. Then, use a compatible softbox or diffuser to soften shadows and create a more natural look.
Furthermore, adjust the brightness and color temperature to complement the background. Once you’re comfortable with a single-light setup, you can consider adding a fill light or background light to create more depth.
Please note that the exact output and compatible accessories depend on the specific Nanlite model you choose.
4. Headphones: Monitor Your Podcast Audio
While microphones capture your voice, headphones help you identify audio problems during recording. Consequently, they can save you considerable editing time later.
For podcast recording, look for comfortable, preferably closed-back headphones that allow you to monitor speech clearly.
Why do you need them?
- They help identify background noise and unwanted sounds.
- You can check whether each microphone is working correctly.
- They make it easier to detect distortion, clipping, and inconsistent volume.
- They allow you to monitor the recording before moving on to editing.
Budget tip: Fortunately, you don’t need expensive studio headphones to get started. A reliable wired pair is often sufficient for basic monitoring.
Most importantly, listen to a short test recording before you begin the full episode. This simple step can help prevent avoidable audio problems.
5. Audio Interface or Mixer
Depending on your microphone and recording workflow, you may also need an audio interface or mixer. These devices help connect microphones to your recording equipment and manage incoming audio.
For example, with a compatible wireless microphone system, you may be able to record directly through its receiver and a suitable recording device. However, a podcast featuring several speakers may require a more advanced audio-routing solution.
Choose based on your setup:
- Solo podcast: A simple microphone and compatible recording device may be enough.
- Two-person podcast: Check how many independent microphone channels you need.
- Multi-person podcast: Consider a mixer or interface with enough inputs and suitable monitoring options.
Budget tip: Before buying additional audio equipment, decide how many people you need to record and whether you want separate audio tracks for editing. That way, you can avoid paying for features you won’t use.
6. Tripod and Camera Accessories
In addition to your camera, a few essential accessories can make your podcast recording equipment setup more reliable. A stable camera setup, for instance, helps maintain consistent framing and prevents distracting movement.
Consider adding the following items:
- A sturdy tripod or camera stand.
- A suitable lens for your recording space.
- Memory cards with sufficient capacity and compatible recording speeds.
- Extra batteries or an appropriate continuous-power solution.
- Necessary cables, adapters, and cable-management accessories.
Budget tip: Although accessories may seem like minor expenses, they are part of the overall equipment budget. Therefore, prioritize a stable tripod and reliable storage before spending extra on items you rarely use.
7. Podcast Set and Recording Space
Even with good podcast recording equipment, your recording environment can affect the final quality. For this reason, choosing a quiet room is just as important as selecting the right microphone.
Ideally, record away from traffic, construction, loud appliances, and other interruptions. In addition, soft furnishings, curtains, rugs, and suitable acoustic treatment can help reduce sound reflections. However, keep in mind that reducing echo is not the same as fully soundproofing a room.
The visual background matters too. A tidy, thoughtfully arranged set can make your podcast look more professional without requiring expensive decoration.
Budget tip: Start with a quiet room and a simple background. As your podcast grows, you can gradually improve the acoustics and visual design.
Ultimately, a well-planned recording space can help you get better results from the equipment you already own.
8. Podcast Editing Software
After recording your episode, the next step is editing. This stage helps you remove mistakes, improve pacing, balance audio, and prepare content for different platforms.
Your software choice will depend on whether you’re producing audio-only episodes or multi-camera video podcasts. Nevertheless, beginners can start with software that meets their immediate needs and upgrade later.
During editing, you may need to:
- Remove long pauses and unnecessary sections.
- Balance dialogue levels and reduce distracting noise.
- Synchronize audio and video.
- Add titles, captions, and branding.
- Create short clips or reels from longer episodes.
Budget tip: Rather than paying for advanced tools straight away, choose editing software that fits your workflow and skill level. Once your production requirements become more complex, you can explore additional features.
9. Podcast Recording Equipment Checklist
Now that we’ve covered the essentials, let’s bring everything together. The following podcast recording equipment checklist can help you plan your setup and identify which items you already have.
| Equipment | Example or recommendation | Purpose |
|---|---|---|
| Microphone | Hollyland LARK 2 | Wireless audio recording |
| Camera | Sony ZV-E10 | Video recording |
| Lighting | Nanlite 300W Bi-Color LED Light | Key lighting for the subject |
| Headphones | Closed-back monitoring headphones | Monitor recording quality |
| Camera support | Tripod or camera stand | Stable framing |
| Audio equipment | Compatible receiver, interface, or mixer | Connect and manage audio |
| Accessories | Cables, memory cards, power solutions | Reliable recording |
| Editing software | Audio or video editor | Edit and export episodes |
| Recording space | Quiet room with suitable treatment | Improve sound quality |
As you can see, you can build a capable setup by focusing on the essentials first. However, the total cost will depend on the exact product versions, lenses, accessories, software, and equipment you already own.
Therefore, get current quotations before finalizing your budget, and remember to include the smaller accessories that make the complete setup work.
10. Should You Buy Podcast Recording Equipment or Rent a Studio?
At this stage, you might be wondering whether buying podcast recording equipment is the right choice. The answer depends largely on how frequently you plan to record and how much time you want to spend managing production.
Buying your own equipment makes sense if you record regularly and want complete control over your setup. However, the initial investment involves more than just a camera, microphone, and light. You may also need accessories, acoustic treatment, storage, editing tools, and time to learn the workflow.
On the other hand, renting a professional podcast studio can be a convenient alternative if you record occasionally or prefer a ready-to-use environment.
Depending on the package, a studio may provide recording equipment, multiple camera angles, lighting, a prepared set, and production assistance. As a result, you can focus more on your conversation and less on technical setup.
At The Flying Kite Studios in Gurugram, creators, entrepreneurs, brands, and businesses can explore studio recording options for video podcasts, interviews, and branded content.
Before deciding, compare the cost of owning and maintaining your equipment with the cost of renting a studio for your expected recording schedule. This comparison can help you choose the option that makes the most financial sense.
11. Common Mistakes to Avoid When Choosing Podcast Recording Equipment
Although choosing good equipment is important, the way you use it matters just as much. Therefore, avoid these common mistakes when planning your podcast setup.
- Ignoring audio quality: Test your microphone and listen to a sample before recording the full episode.
- Using poor lighting: Avoid relying entirely on harsh overhead lights or uncontrolled window light.
- Buying unnecessary gear: Choose equipment based on your actual recording requirements.
- Forgetting accessories: Remember that memory cards, cables, stands, and power solutions are part of the real budget.
- Ignoring room acoustics: Reduce echo and background noise before investing in expensive upgrades.
- Skipping a test recording: Check audio, focus, exposure, and storage before every session.
- Overlooking editing time: Plan for editing, captions, and social media clips as part of the production process.
By addressing these issues early, you can avoid unnecessary expenses and create a more reliable recording workflow.
Conclusion
Choosing the right podcast recording equipment doesn’t require buying the most expensive products on the market. Instead, focus on selecting equipment that works well together and meets your actual recording needs.
A well-planned setup featuring the Hollyland LARK 2 wireless microphone, Sony ZV-E10 camera, and Nanlite 300W bi-color LED light can provide a useful starting point for audio, video, and lighting. Combined with stable camera support, suitable accessories, a quiet recording space, and a reliable editing workflow, these essentials can help you make the most of your budget.
Furthermore, remember that good storytelling and consistent content are just as important as technical quality. As your podcast grows, you can upgrade your equipment based on the requirements of your show.
If you’d rather focus on your content than manage equipment and production, consider recording at The Flying Kite Studios, Gurugram. Explore the available studio options and choose a setup that suits your podcast format and production goals.
Ready to record your next episode?
Visit The Flying Kite Studios to explore podcast studio options in Gurugram, or call +91 92665 73737 to discuss your requirements.
Frequently Asked Questions
1. What podcast recording equipment do I need to get started?
At a minimum, you need a microphone, a recording device, headphones, and a quiet space. For a video podcast, you’ll also need a camera, suitable lighting, and a stable tripod. Additionally, editing software will help you prepare the final episode.
2. Is the Hollyland LARK 2 suitable for podcast recording?
Yes, it can be a convenient option for interviews and video podcasts. However, check the selected configuration, number of speakers, recording workflow, and audio-monitoring requirements before choosing it for a multi-person show.
3. Can I use the Sony ZV-E10 for a video podcast?
Yes. The Sony ZV-E10 is suitable for many video-podcast and interview setups. However, remember to consider the lens, camera support, storage, power, and recording settings when planning your budget.
4. Why is a bi-color LED light useful for podcast recording?
A bi-color light lets you adjust its color temperature to better match the room lighting or create a particular visual mood. In addition, a suitable diffuser can help soften the light on the speaker.
5. Is it cheaper to rent a podcast studio than buy recording equipment?
It depends on how often you record and what the studio package includes. Renting may be more convenient for occasional recordings, whereas purchasing equipment may make more sense if you produce episodes frequently.
6. Where can I rent a podcast studio in Gurugram?
You can contact The Flying Kite Studios in Gurugram to discuss available recording setups and production options. This can be a practical alternative if you’d prefer a studio environment without purchasing every piece of equipment yourself.